If you’ve read the Paddington Bear stories, you might remember the one where Paddington tries to make a magazine rack out of plywood, but accidentally saws up the kitchen table of his grumpy next-door neighbour, Mr Curry. Then, as Paddington tries to fix the table, he ends up making things steadily worse – sawing bits off each of the legs in turn until it’s too small for anyone to sit at.
In our house, ‘Mr Curry’s kitchen table’ has become a byword for any project that’s going backwards rather than forwards.
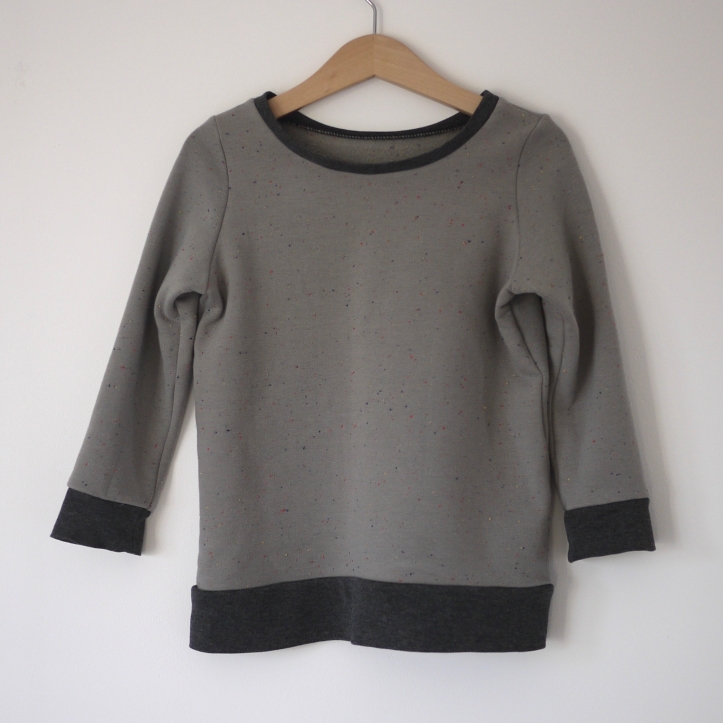
I started out intending to make a sweatshirt for me – New Look 6314, View A. Despite the uninspiring envelope (seriously, who commissions this stuff?), it’s a basic womens sweatshirt pattern with slightly dropped shoulders, ribbed cuffs and waistband. I considered making a Linden, but raglan sleeves often make me look slopier in the shoulders than I like to think I am, so I prefer a set-in sleeve. I planned to use the grey colourway of this flecked sweatshirting, which had been loitering in my stash for most of last year.
Plan A
I made my usual alterations to the pattern, adding length in the bodice and the sleeves. For a loose-fitting, dropped-shoulder design like this I chose the size that matched my full bust measurement, rather than faffing around with a smaller size and an FBA.
The stupid mistake was that I started cutting out without double, double checking that I could fit all the pattern pieces onto my fabric. It almost fitted with the fabric folded in half, so I just assumed I could cut flat and get it all in, but it turned out I was wrong. And once I’d started cutting, I’d gone too far to convert it into an Astoria, and neither could I find any more of the fabric online. Grrr.
Plan B
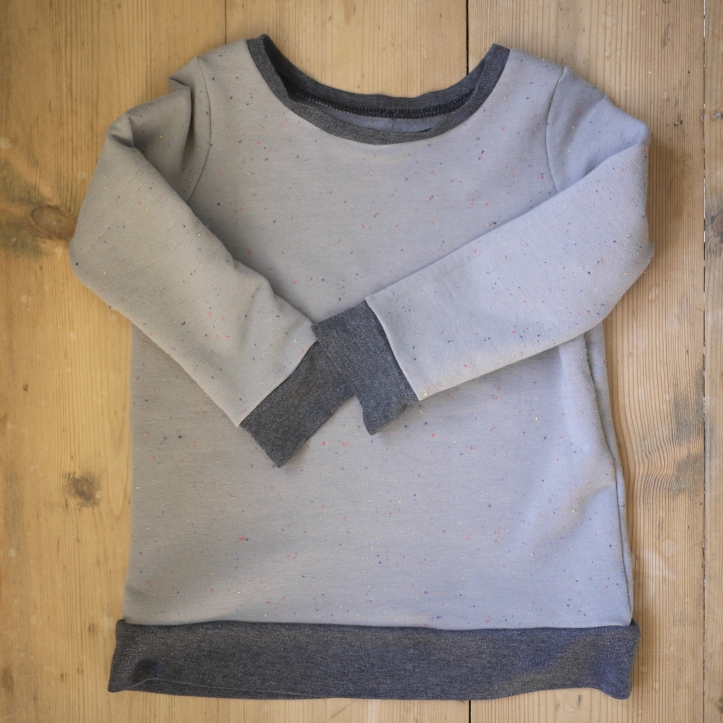
Instead, I thought I’d turn it into a sweatshirt for my son. I found this tutorial through the Oliver + S website, and fished out my copy of the School Bus Tee pattern.
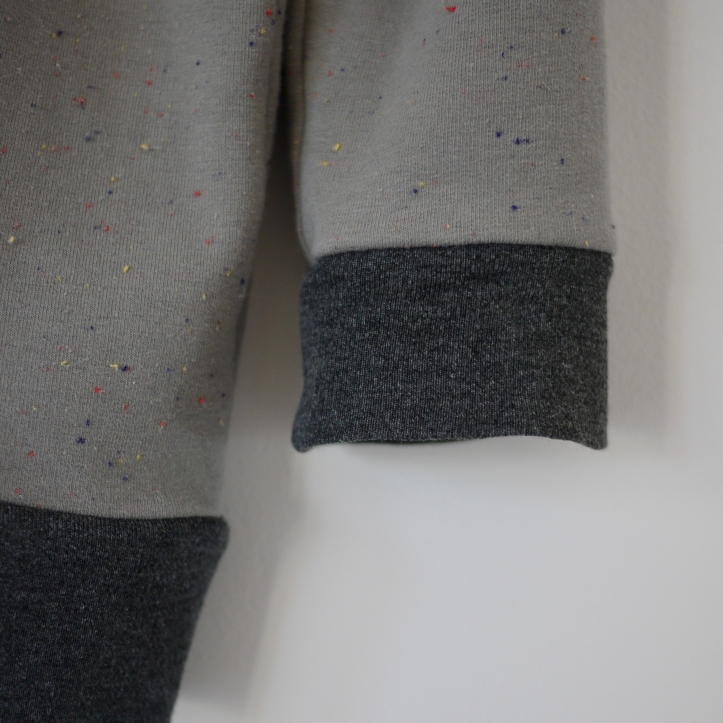
The tutorial suggested going up one size for a sweatshirt, so I measured him, traced the pattern and began cutting out the children’s size 7 from the adult sweatshirt pieces and the leftover scraps. I used a dark grey jersey remnant for the neckband, cuffs and waistband.
This is a straightforward pattern to make and it sewed up quickly – until my son came to try it on and it wouldn’t go over his head!
Back to the drawing board again – I cut off the neckband and widened the neckline following this tutorial for a BHA (Big Head Adjustment!). I also decided to cut off and re-do the cuffs , as the jersey was much stretchier than the sweatshirting and was looking a bit flappy.
My son tried it on again, and it did go over his head this time, but overall it was too small in the body and in the arms. So now it’s going to his three-year old cousin instead!
I’d like to try the School Bus Tee pattern again, but I think I’d go up two sizes in a sweatshirt, rather than just one. And I’ve learnt (again!) always to baste the neckband in with a long straight stitch to test the fit before sewing it immovably. Looking at these pictures, I can see I also need to stitch the neckband down with either a zigzag or a twin needle – a stern press just isn’t going to cut it.
I’m not sure if I’m going to bother trying a sweatshirt for me again or not. The Curated Closet book I’m working through has got me thinking critically about the crew necklines I wear, and right now I’d like to try something different.
Have you had a cutting out disaster recently, and were you able to salvage something from it?

So funny!
It reminds me of when I used to cut my hair bangs back in high school. One side would looks shorter. Then the other side would look shorter. Then… well, you can imagine! (One time I had to wear a wide hair band for a few months to cover up the botched result.)
LikeLike
Oh no, poor you! That’s a classic kitchen table situation – you can’t leave it the way it is, but every time you try to make it better it actually gets worse! It grew out, though, right?!
LikeLike
[…] Finally the star is cut from my scraps – yay – a leftover from an old sweatshirt fail. […]
LikeLike