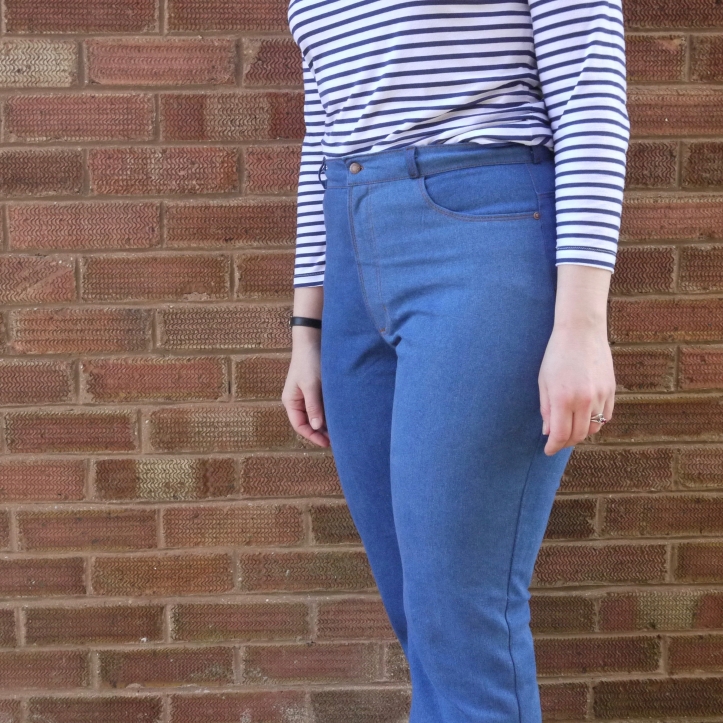
This has been a long time coming, but my first-ever pair of Ginger jeans is finished. And boy, am I pleased with the results!
I’ve been after a pair of high-waisted flared jeans for ooh, about forever. And I finally gave in and decided I was going to have to make them myself.
The fabric is a lovely, soft, true blue stretch denim that I bought from Guthrie & Ghani last year in just the right weight/stretch combination for this pattern. One word of warning – if you’re long-legged, want to try the flared adaptation, or are planning to use extra large seam allowances to help with fitting, then buy more fabric than the skinny-legged Gingers pattern suggests. The cutting layout isn’t all that flexible because the denim has to be laid a certain way to prevent the legs twisting. I had 2.5m of 60″/150cm wide denim and that was only just, just enough.
For the pocket stay and waistband facing I used a polka dot Sevenberry cotton lawn in teal, also from Guthrie & Ghani, leftover from these Thurlow trousers.
Fitting alterations
The fitting process has turned into a real quest for me. I began sewing all those years ago because high street trousers didn’t fit – and having gone through this process I now know why! I must have taken them on and off at different stages of construction at least twenty times, so if you can spend a whole day sewing in just your underwear (!) you’ll probably get them finished a lot faster than I did.
I started with the size 16 to fit my 43″ hips, and graded down to a 14 at the waist at the same time as flaring the legs from the knee. I then lengthened the crotch depth by 1″ and also checked the total inside leg against my own measurements. These are my standard alterations for any pattern, and I usually find it’s fine to make these straight on the pattern without doing a toile/muslin first.
Taking a tip from Pants for Real People, I also enlarged the seam allowances to 1″ rather than 5/8″ at the inseams and outseams before cutting out to give me plenty of room for alterations. This was a complete lifesaver – and you should absolutely do this if you’re about to cut into good fabric for your first pair.
The first, second and third fittings showed up lots of issues, so I then also made the following adjustments, one at a time:
- Let out the inseam and outseam along the thigh by 1/4″
- Lowered the back crotch only by 3/4″ (in 3-4 stages)
- Made the front crotch seam shallower by 1/4″
- Let out the inseams from the knee downwards to make room for my large calves
- Re-cut the yoke with more curve (effectively putting darts in the pattern to make it narrower at the top)
- Steamed the waistband like crazy with the iron to give that more curve and trimmed it shorter (I’d run out of fabric by this point and was trying to avoid piecing it)
- Sewed the back leg/yoke seam with a wider allowance at the centre back, reverting to the ordinary seam allowance at the side seams – this helped deal with my swayback
- Took a big wedge out of the side seams at the top hip, effectively grading down to a size 10 there.*
- Yanked up the centre back so it sits further into the waistband, and the same with the centre front
- Oh, and I fiddled endlessly with the back pocket placement to see if I could manage to disguise my low seat!
I discovered I have what Pants for Real People creepily describes as a ‘crotch oddity’, in that I’m low in the back and high in the front. If this is you, you’ll notice that your RTW trousers always seem to either drag down at the back or disappear into your bum crack, yet you might also have some weird puffiness in the front crotch.
I didn’t have wide enough seam allowances to make the front crotch seam as shallow as I wanted, but it’s good enough – and I’ll know for next time.
*You can’t really tell in these pictures, but my right leg is around 1.5cm shorter than my left, and my pelvis is also smaller on the right side. This means I make side seam alterations unevenly, taking slightly more from the right side than the left. Plus I ended up placing the back pockets by eye, rather than using the pattern markings, so that everything looks more balanced and even.


Construction
Compared with the fitting, construction was – almost – a breeze. Heather’s instructions (I used the E-Book) are clear and logical, so it doesn’t feel as daunting as you might expect. You absolutely can make jeans.
My Janome DKS30 didn’t much like doing dense stitching with topstitching thread through multiple layers. It really hated backstitching and bar tacks through more than 3 layers. If you have the same problem it’s worth buying a regular thread in the same colour as your topstitching thread and trying the bar tacks with that instead. I did this on the belt loops and it made things easier – it worked better than switching stitches, or changing needles. I also did a fair amount of the backstitching using just the hand wheel, and avoided the automatic thread cutter. Next time I might get my vintage Singer 201K out for the topstiching, although she doesn’t have a zig zag stitch, so I won’t be able to use her for the bar tacks.
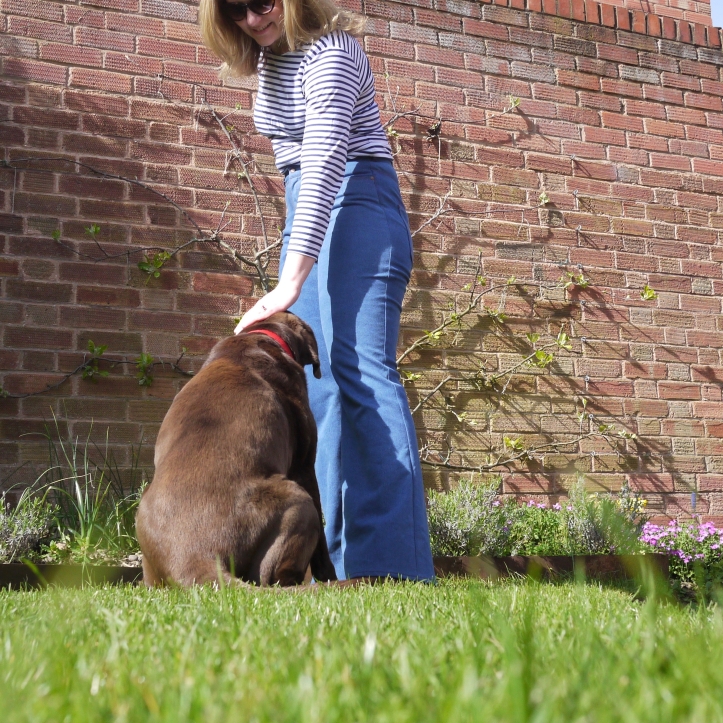
What my machine does have that helped a lot, is a small black button on the presser foot which fixes the angle of the presser foot, even when you’re starting at a thick edge. This meant I got away without using a hump jumper.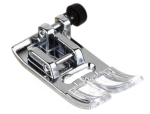
You press the black button as you lower the foot (it does help if you have three hands), and then begin sewing as normal. The presser foot will stay level even if you go over a hump, and *should* hold a fairly even stitch.
I used my overlocker (serger) to finish the seam allowances for speed, but it protested at anything more than three layers of denim, so I also employed the overedge stitch on my ordinary sewing machine. This is a really secure way to finish fraying fabrics, and it comes into its own when you don’t want to cut anything off – for example if you’re going to use that edge to line up something else.
The Prym rivets and jeans button kits I bought did turn out to be partially plastic, but they’re holding up well so far. (I’m probably going to live in these jeans for the next month or so, and the proof will be in how much pudding I can eat in them!)
The rivets were really fun to put in, and the only casualty was one of my thumbnails which accidentally took a battering when I got distracted by the doorbell…Can any UK sewists recommend a good source of metal ones for me?
If you’ve been hesitating about sewing jeans, I’ll be honest with you. No, it’s not as quick as a skirt or as easy as a jersey top.
It’s way more satisfying.

Congratulations on making your first jeans! All that fitting work was definitely worth it as these look great 🙂 Now that you’ve got the pattern fitting well are you planning some more? I’m also keen to find a UK supplier of all metal buttons and rivets but no luck yet I’m afraid.
LikeLike
Thank you Alex – right now I’m just so relieved they’re finished… but yes, I suspect another pair in a darker wash is probably in the offing somewhere in the autumn. The second pair is always quicker, right?
LikeLike
I changed the leg design a fair bit on my second pair, so couldn’t honestly say they were quicker. But am now on my third pair and they definitely are 🙂
LikeLike
Phew. Maybe I’ll be tempted then 🙂
LikeLike
Wow!! These look amazing, they fit you so well and are just awesome, such a difference between your first and final versions. I live in skinny jeans and need some new ones but haven’t yet felt ready to try making them (haven’t made any trousers yet) but I’m thinking I need to get my butt in to gear and get on with it. It’s good to know the ebook is good and that the G&G denim is fab too, no idea about rivets but do shout if you find some. Thank you for sharing.
LikeLike
Thank you Lynsey. I’m really chuffed with these, even if it took me a while to reach the finish line. If you feel like tackling jeans in the future, it is a really satisfying process. And I suspect most people are simpler to fit than my oddly-shaped lower half 🙂
LikeLike
They look great.
I made jeans for my husband and used all metal rivets etc – I’ll try to find where I got them from (UK) and let you know.
Your pattern changes sound very similar to mine inc crotch oddity! I made the jeans for DH as not ready with fit for me (I was doing a course at the time) Trousers first, then jeans. Anne
LikeLike
Thank you Anne. So impressed that you’ve made men’s jeans – especially when there’s so little help out there on the web for that kind of sewing. I had a hunch we might be a similar shape from something you mentioned last week – it’s nice to know I’m not the only one!
LikeLike
Rivets Hemline H467/BRO | Bronze Rivet Kit | 7mm | 20 Pieces
by Hemline from the Quilted Bear
Jeans Denim Brass Loose 20 Waist Buttons High Quality Press / Hammer on Easy to Fix Buttons from Truefaceuk
I bought via Amazon and both still available though maybe not from same sellers
They have worked well with no issues – bought 2 years ago and jeans used regularly
LikeLike
Thanks very much, I’ll take a look.
LikeLike
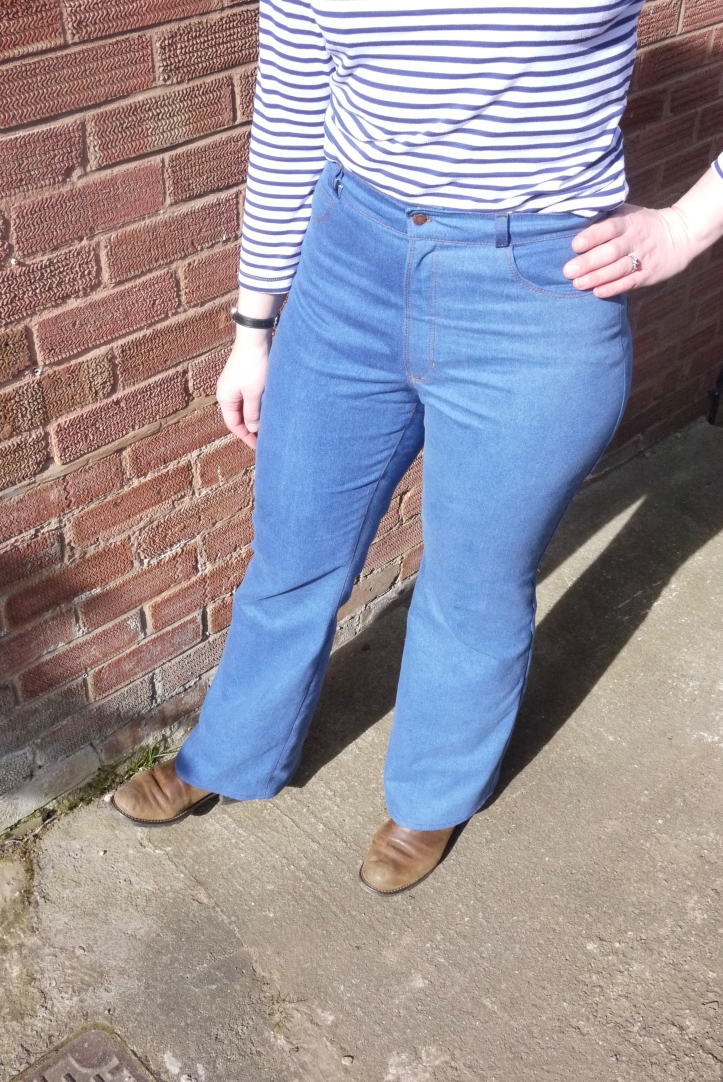
Well-tailored and obviously well-made—and giving enough to pat a dog’s head—success!
LikeLike
Thank you Jonathan. The dog definitely approves.
LikeLiked by 1 person
LOL WOOF!
LikeLike
My favorite tip of this whole read was “It helps if you have three hands.” because sometimes I think an extra hand would solve most of my issues! A great read with all your mods. I have never attempted jeans but dream about a great fitting pair in my future. 🙂
LikeLike
😀 Extra hands would be a true sewing superpower.
LikeLiked by 1 person
Your story echoes mine – except I have been making trousers… using the book to fix your problems, puffiness, one leg longer than the other, all that. You ended up with a fine pair of jeans. I have made trousers and jeans last year – but I think my body has changed – so I am back to fitting all over again. I enjoyed reading about your adventures!
LikeLike
Thank you Linda. It’s been a weirdly fascinating journey, and it’s helped me understand a lot about why RTW trousers usually look so awful on me. I’ll be interested to read how you get on with revisiting your fitting process, too 🙂
LikeLiked by 1 person
[…] of my jeans fit as well as I’d like. Sadly, even my handmade Gingers have stretched out since I finished them, and no longer have the fit I was aiming for. I really, […]
LikeLike